I am a technocrat and now days I am doing work from home. During this time we have to manage with the team and sometimes have to share screenshots for any sort of requirement. But it’s embracing to ask our colleagues that how can I take Screenshots can you please help?
Oh no, they suggested please check with google as everything is up on google. “Google is overloaded with lots of queries but it can handle” Sometimes I think how who helps google in case of their need, then the answer is the content creator who provides the correct and easy information through their website or blog:
So now if you have a query like the below then you can continue your reading this blog can help you in a better way. And; In this I will share tried and tested ways to take the Screenshot hassle-free within a second;
User Queries:
how to take screenshot in laptop
how to screenshot on laptop
how to take screenshot in laptop windows 7
how to take a screenshot on hp laptop
how to take ss in laptop
how to take a screenshot on a dell laptop
how to take screenshot in laptop windows 10
how to take screenshot in lenovo laptop
Method 1: How to take screenshot in laptop windows 7 or any other Laptop Brand?
It does not matter which laptop brand/operating system or browser you are using. These steps can help you in all way:
- Open the page you want to take a Screenshot then press the Windows key and Print Screen at the same time to capture the entire screen. Your screen will dim for a moment to indicate a successful snapshot.
Note – You can only press the print button and take the screenshot easily and save it in Microsoft Word and save.
- Open an image editing program (Microsoft Paint, Microsoft Word, GIMP, Photoshop, and Paint Shop Pro will all work).
- Open a new image and press CTRL + V to paste the screenshot. You can also right-click and press Paste.
- Save the file as a JPG or PNG and place it into an easily accessible folder for quick sharing.
Do you want to know how to take screenshots without the print screens? Continue reading for the multiple methods:
Method 2: How to take screenshot in laptop windows 7 – A particular Portion Via Snip & Sketch?
Do you want to capture a particular portion of your screen? Yes, you can do it using Snip & Sketch; it makes you select the portion of the screenshot in different shapes.
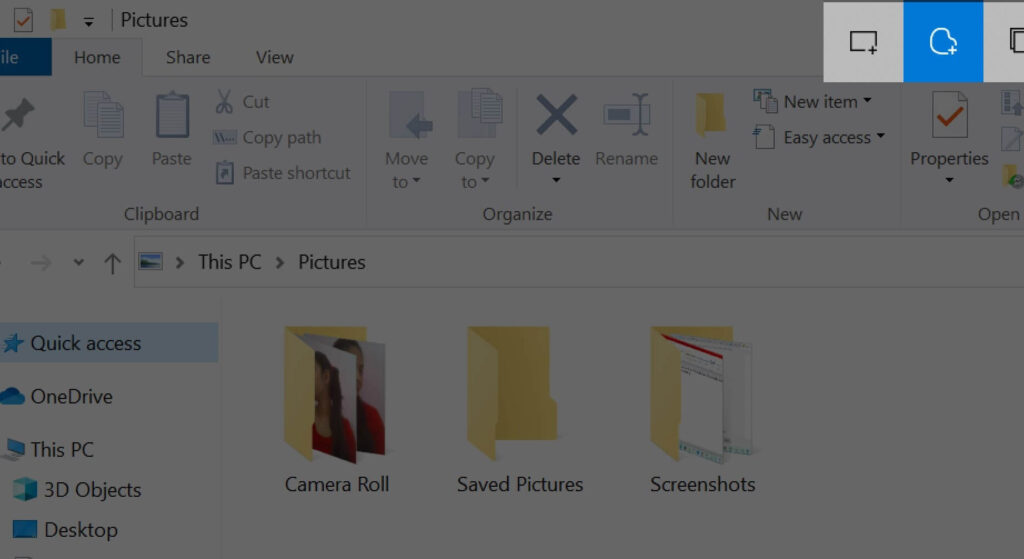
- Press the Windows key + Shift + S at the same time. Your screen will fade to a white overlay and at the same time, your cursor will change from a pointed cursor to a crosshair cursor.

- Select the portion of your screen that you wish to grab. The snippet will disappear from your screen and copy onto your computer’s clipboard.
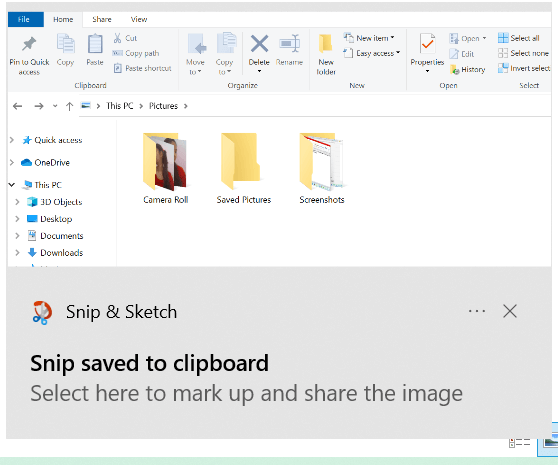
- You will get a quick notification, click on that it will open the Snip & Sketch tool

- In last step; You can save the screenshot as a JPG or PNG file.
Method 3: How to take screenshot in laptop windows 7 Via Snipping tool?
This is the most frequent and usable tool. Since all Windows desktop computers come equipped with the snipping tool, the application lives within your start menu. Once accessed, these steps will lead you through a seamless 3-step screenshot process.
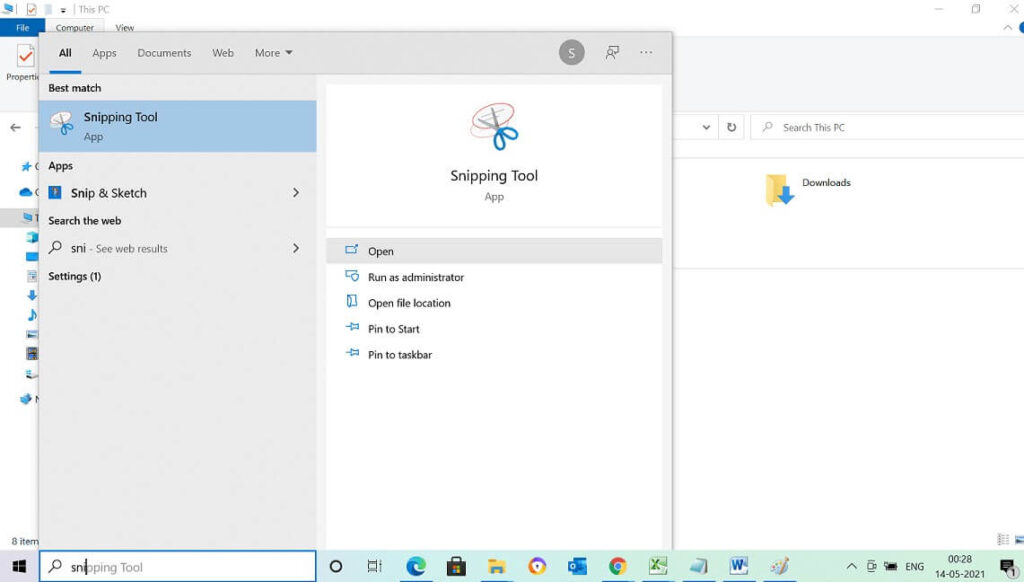
- Go to Search menu and type “Snipping Tool”

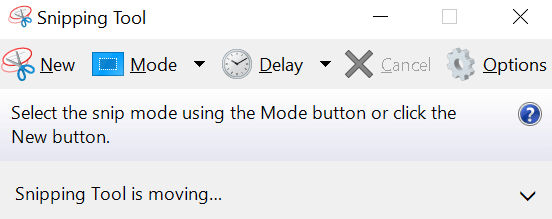
- And then; Click on the new and, drag the cursor to make a rectangular outline of the desired area.

- Then go to the file and save your Screenshot.
The snipping tool comes with a number of added perks that allow you to switch modes, pen, and highlighter options to draw on your screenshot to make annotations and point-outs clear and easy.
These are the common methods that you can utilize for taking the Screenshot. However, if you want to capture the screenshot in pdf format or quality image then you can search for “screenshot capture extension chrome” or “screenshot capture extension Mozilla “
Also, you can simply add the extension on your browser and perform the below steps:
- Firstly, Open the page you want to capture the screenshot
- Then Click capture Screenshot
- Then Download your file in PDF or Image format
I hope this piece of information will be helpful for you. Thank you for taking your time to read this information. Stay connected with us for more technology “How To” and “DIY” blogs.
RELATED POSTS
View all


